
この記事では機械メーカ勤務のプログラマーが、サクッとTensorflowで画像認識する方法を解説します。
なにも難しいことはなく、ほとんどコピペだけでできます。
コードの紹介後、コードの中身をわかりやすく解説します。中身が知りたい人や基礎レベルを上げたい人は見てみてください。
こんな方におすすめ
- Python、画像認識を学習し始めた方
- プログラム使って遊んでみたい人
- Pythonプログラマーとして自身つけたい人
Tensorflowで画像認識するコード
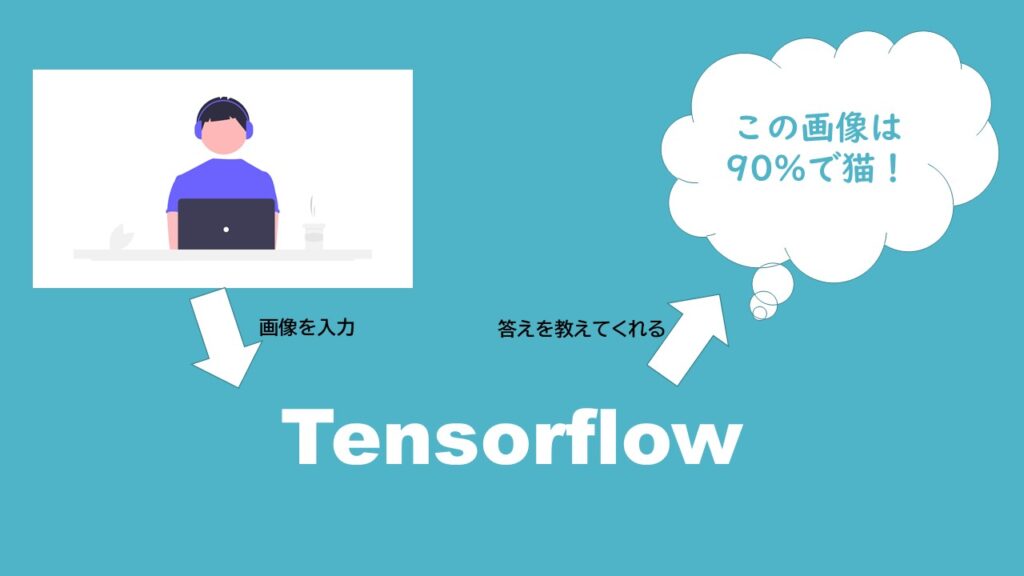
この記事を見に来ていただいた方が一番知りたい『Tensorflow』で画像認識するコードを、紹介し解説したいと思います。
ここに記載したコードを使えばこんなことができるようになります!
Tensorflowのインストール
Tensorflowを使うためには、まずインストールが必須です。cmdやanaconda promptで実行してください。
すでにインストール済みであれば、次に進んでください。
pip install tensorflow
これだけで、Tensorflowをインストールできます。
インストールできたかどうかは以下を実行してみてください。
import tensorflow as tf

print(tf.reduce_sum(tf.random.normal([1000, 1000])))
こんな感じにアウトプットが出れば、問題なくインストールできています。

学習済みモデルの読込み
Tensorflowが問題なくインストール出来たら、さっそくコードを書いていきましょう。
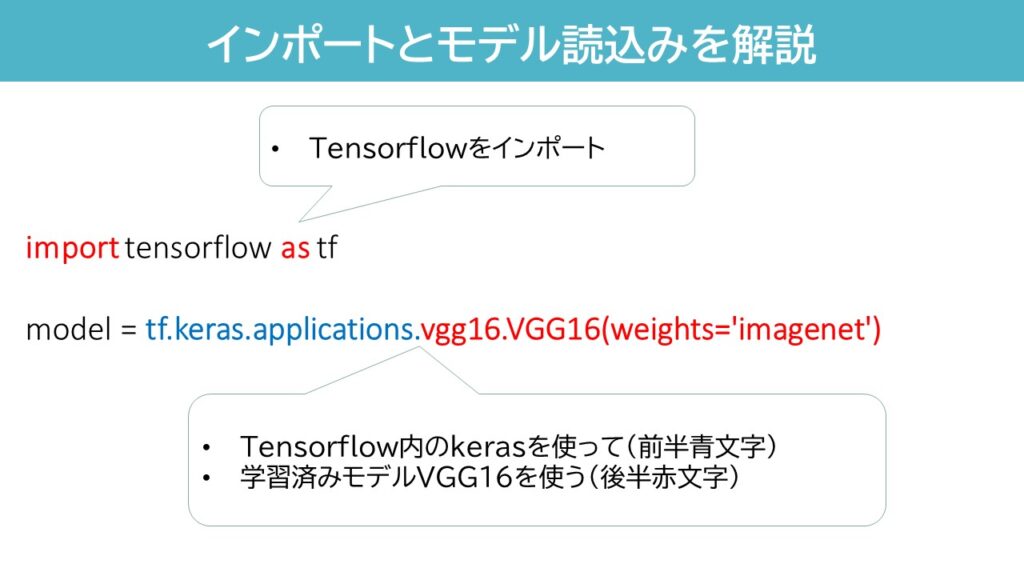
import tensorflow as tf

model = tf.keras.applications.vgg16.VGG16(weights='imagenet')
実行するとこんな感じにアウトプットされます。↓↓
大体1分くらい時間かかるかと思います。

このコードは一回実行してしまえば、プログラムを終了しない限り、再実行は不要です。
何をやっているのか解説しますね。
解説
- 一行目:Tensorflowをインポート
これをやっとかないと何もできません。 - 二行目:Tensorflowに含まれるkerasを使って、学習済みモデル『VGG16』を読み込んでいます。
画像認識コード
さて、学習済みモデルの読込みまで終わりましたら、実際に写真を入力しなんの画像なのか認識してもらいましょう。
コードをコピペし、二行目にローカルに保存した画像のパスを指定してください。
コードはこちら↓
#入力する写真のパスを指定する。C:/~~
img_path = r"ここに写真のパス(リンク)を入力しよう!"

img_pil = tf.keras.preprocessing.image.load_img(img_path, target_size=(224, 224))

#print(type(img_pil))
# <class 'PIL.Image.Image'>

img = tf.keras.preprocessing.image.img_to_array(img_pil)
#print(type(img))
# <class 'numpy.ndarray'>

#print(img.shape)
# (224, 224, 3)

#print(img.dtype)
# float32

#print(img.min(), '-', img.max())
# 0.0 - 255.0

img = img[tf.newaxis, ...]
#print(img.shape)
# (1, 224, 224, 3)

img_preprocessed = tf.keras.applications.vgg16.preprocess_input(img)
#print(img_preprocessed.min(), '-', img_preprocessed.max())
# -117.68 - 151.061

predict = model.predict(img_preprocessed)
#print(type(predict))
# <class 'numpy.ndarray'>

"""
print(predict.shape)
# (1, 1000)

print(predict[0][:10])
# [4.5425102e-07 6.2950056e-07 2.4502340e-09 1.5132209e-09 1.7509529e-09
#  1.2035696e-07 2.0865437e-08 1.2301771e-04 9.0907934e-06 5.3701660e-04]
"""


result = tf.keras.applications.vgg16.decode_predictions(predict, top=5)
pprint.pprint(result)
# [[('n02486410', 'baboon', 0.96402234),
#   ('n02484975', 'guenon', 0.013725309),
#   ('n02486261', 'patas', 0.012976606),
#   ('n02487347', 'macaque', 0.0034710427),
#   ('n02493509', 'titi', 0.0015007565)]]

"""
print(type(result))
# <class 'list'>

print(type(result[0]))
# <class 'list'>

print(type(result[0][0]))
# <class 'tuple'>
"""
name = result[0][0][1]
rate = round(result[0][0][2]*100,1)
print(f"入力した画像は{name}です。確率は{rate}%です。")
画像認識した結果
僕が試しに実行したときの入力画像と認識結果を提示します。
入力画像↓
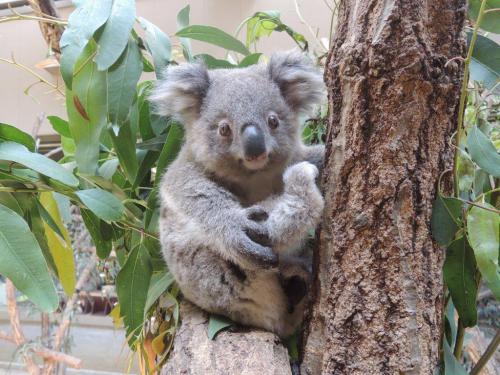
画像認識結果↓
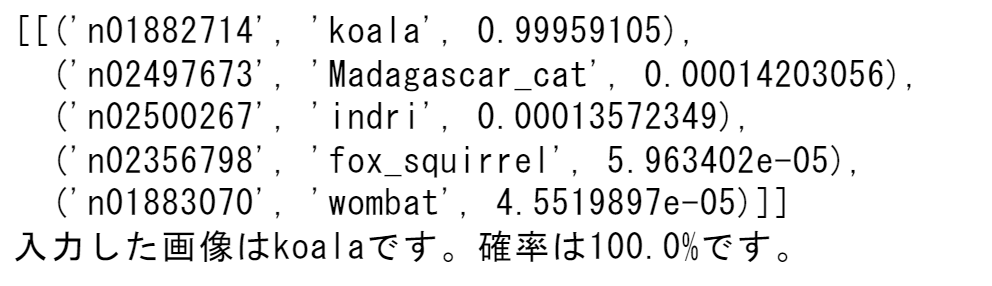
1~5行目:モデルが画像を認識し、結果の上位5つを出しています。左からID、名前、確率です。
6行目:もっとも確率が高い答えと、その確率(小数点第二位を四捨五入)を表示しています。
まとめ:サクッとTensorflowで画像認識する方法を解説しました
サクッとTensorflowで画像認識する方法を解説しました。
なかなかどこのページを見ても、難しくてなんだか敷居を高く感じてたと思います。
この記事を見て少しでも画像認識に興味を持っていただけたら幸いです。
最後に全コードを記載します。
全コード
import tensorflow as tf

model = tf.keras.applications.vgg16.VGG16(weights='imagenet')

#入力する写真のパスを指定する。C:/~~
img_path = r"ここに写真のパス(リンク)を入力しよう!"

img_pil = tf.keras.preprocessing.image.load_img(img_path, target_size=(224, 224))

#print(type(img_pil))
# <class 'PIL.Image.Image'>

img = tf.keras.preprocessing.image.img_to_array(img_pil)
#print(type(img))
# <class 'numpy.ndarray'>

#print(img.shape)
# (224, 224, 3)

#print(img.dtype)
# float32

#print(img.min(), '-', img.max())
# 0.0 - 255.0

img = img[tf.newaxis, ...]
#print(img.shape)
# (1, 224, 224, 3)

img_preprocessed = tf.keras.applications.vgg16.preprocess_input(img)
#print(img_preprocessed.min(), '-', img_preprocessed.max())
# -117.68 - 151.061

predict = model.predict(img_preprocessed)
print(type(predict))
# <class 'numpy.ndarray'>

"""
print(predict.shape)
# (1, 1000)

print(predict[0][:10])
# [4.5425102e-07 6.2950056e-07 2.4502340e-09 1.5132209e-09 1.7509529e-09
#  1.2035696e-07 2.0865437e-08 1.2301771e-04 9.0907934e-06 5.3701660e-04]
"""


result = tf.keras.applications.vgg16.decode_predictions(predict, top=5)
pprint.pprint(result)
# [[('n02486410', 'baboon', 0.96402234),
#   ('n02484975', 'guenon', 0.013725309),
#   ('n02486261', 'patas', 0.012976606),
#   ('n02487347', 'macaque', 0.0034710427),
#   ('n02493509', 'titi', 0.0015007565)]]

"""
print(type(result))
# <class 'list'>

print(type(result[0]))
# <class 'list'>

print(type(result[0][0]))
# <class 'tuple'>
"""
name = result[0][0][1]
rate = round(result[0][0][2]*100,1)
print(f"入力した画像は{name}です。確率は{rate}%です。")

